
Finding the right gear in Sir Adventure is a bit of chore, there is a lot of play between gears and my knuckles keep hitting the dash. Getting across to 1st gear (left and down on 5 speed gearbox) also requires a good deal of force and it is scraping against something when moving up and down .
The following image heavy post details installation of a Gear Stick Refurbishment Kit (from Just Kampers) as well as a new Gear Lever Bellows and Gear Lever Cap (from Brickwerks).
Many thanks go to the Wiki entry on Club 80-90 which I followed for this.
Gear Lever Removal


With the wheel removed you can access the gear linkage box.
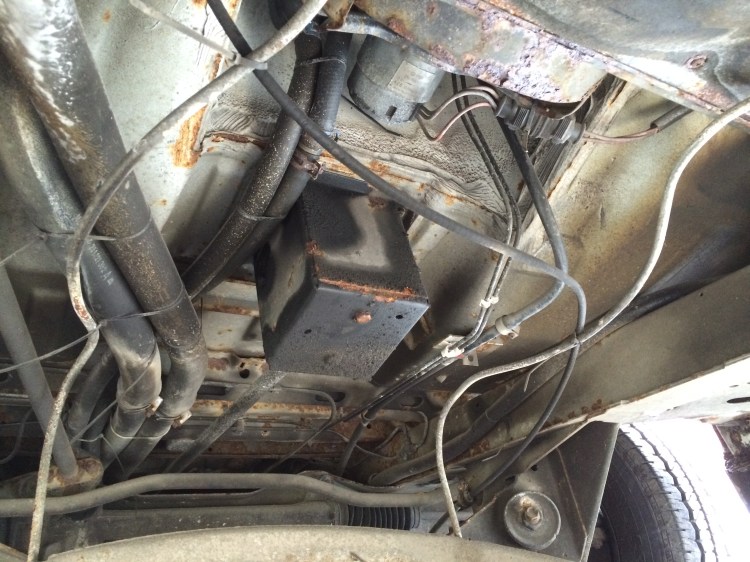
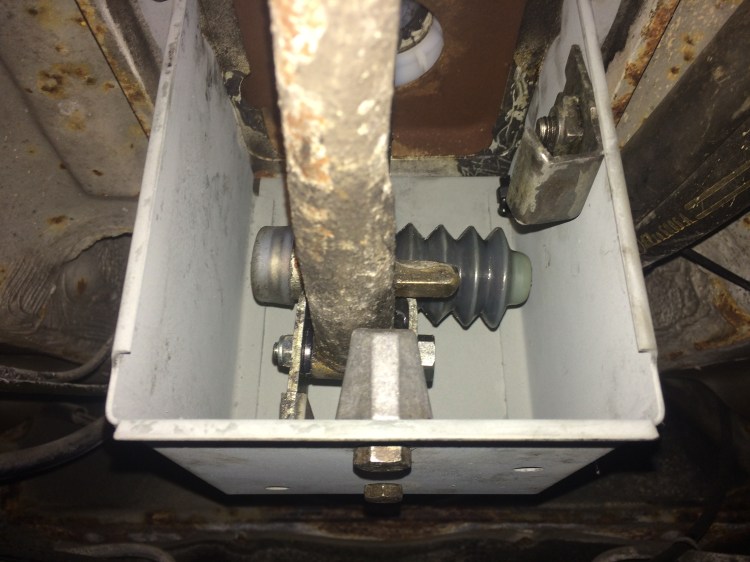
The next photo is of the inside of the box looking back towards the front of the van. It’s immediately obvious that the perished bellows and gunk will be affecting how well the gear lever operates.
Remove the 4x 10mm bolts securing the box and it lifts away from the underside.
Upper Assembly
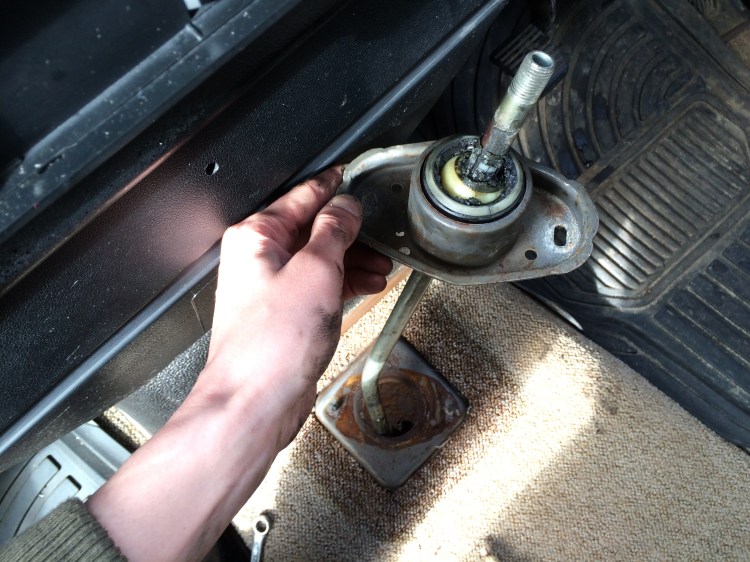
To remove the upper gear lever assembly go into the cab, and pull up the rubber cover from the floor.
Important: Before doing anything mark the location of the 4 holes using a marker pen or by scratching the metal. You need these marks to re-align your replacement assembly.
Unscrew the gear knob then undo the 2x 10mm bolts and spring brace (it will shoot off so be careful). The assembly can then be moved up the gear lever and removed.
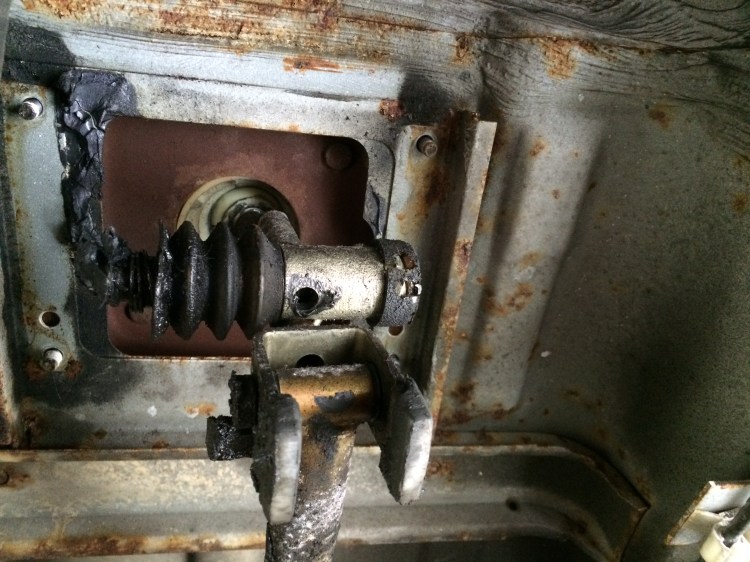
Back under the van, undo the bolt securing the lever to the linkage and the whole gear lever will come free.


Gear Lever Linkage Box
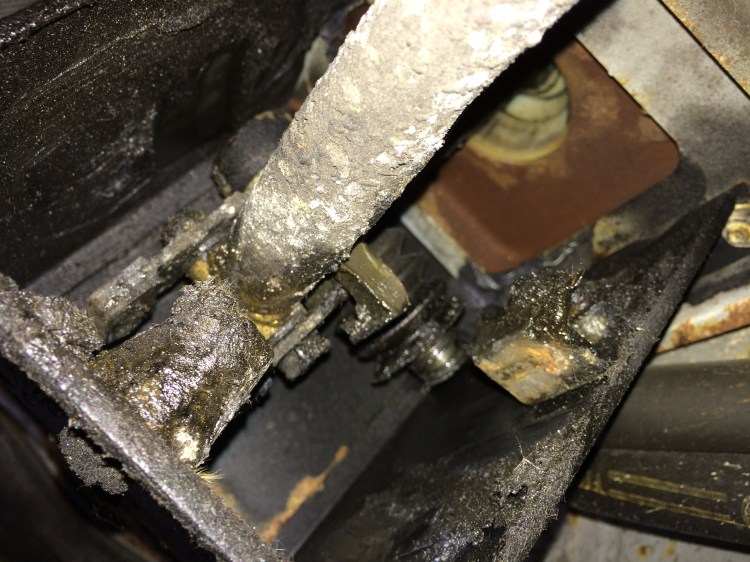
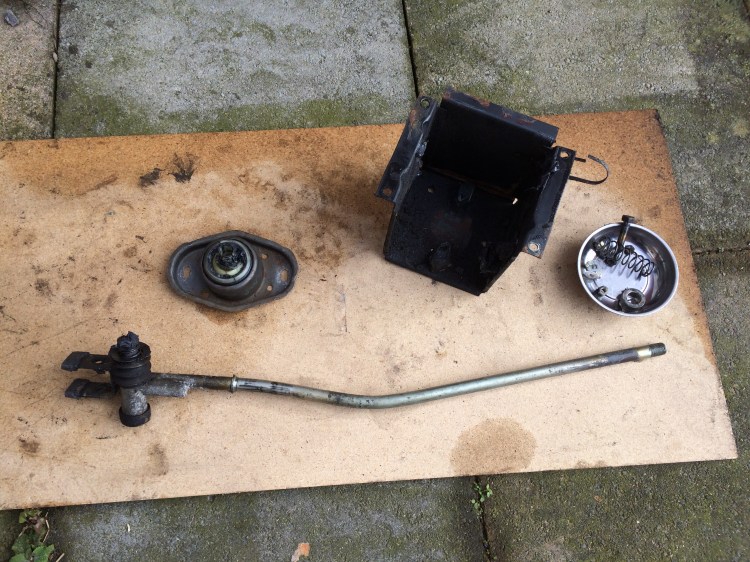
With everything removed, the first step was cleaning up the box. I used Bilt Hamber Surfex HD degreaser to de-gunk everything then sprayed the box with Bilt Hamber Electrox to protect against corrosion.
The metal arm on the side of the box is what stops you going into reverse without first pushing down on the gear lever.
You can see the wear on the aluminium guide blocks. I’m sticking with these for now but replacements are available from Brickwerks. (They’ve seen 25 years so far and think they’ll be good for a little longer).


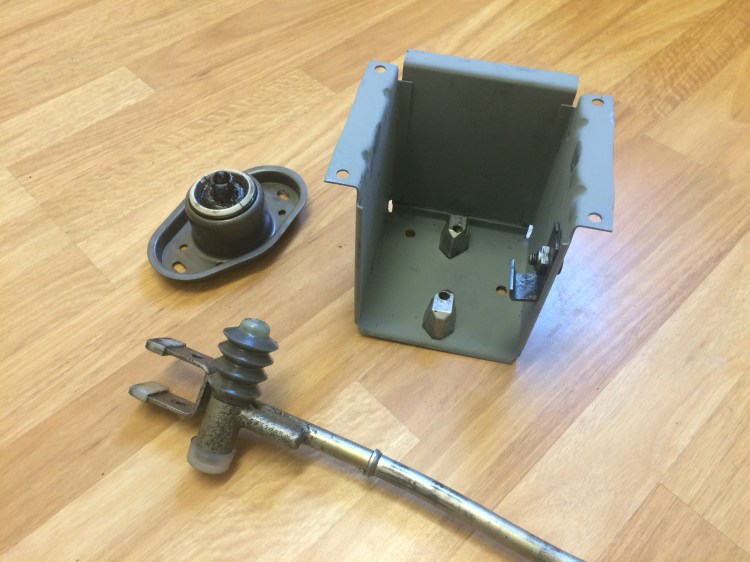
Gear Lever Assembly
The Gear Stick Refurbishment Kit from Just Kampers contains all the parts for the assembly as well as new bushes and bolt where the lever attaches to the linkage.
It’s a case of putting the bits together, adding grease and forcing the assembled parts into the black rubber ring. This was quite an effort, if I did it again I would probably warm the ring in hot water to soften it up beforehand. (I don’t have any pictures of putting it together as I had grease absolutely everywhere!).


Gear Lever
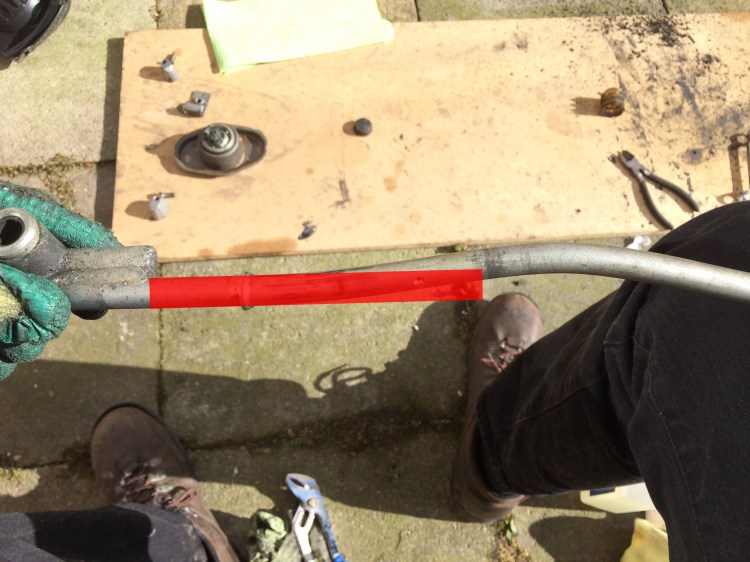
The scraping sound when moving up and down in 1st and Reverse is most certainly due to the split bellows. The loss of lubrication will be also be why a lot of force is needed to get it over to the left.
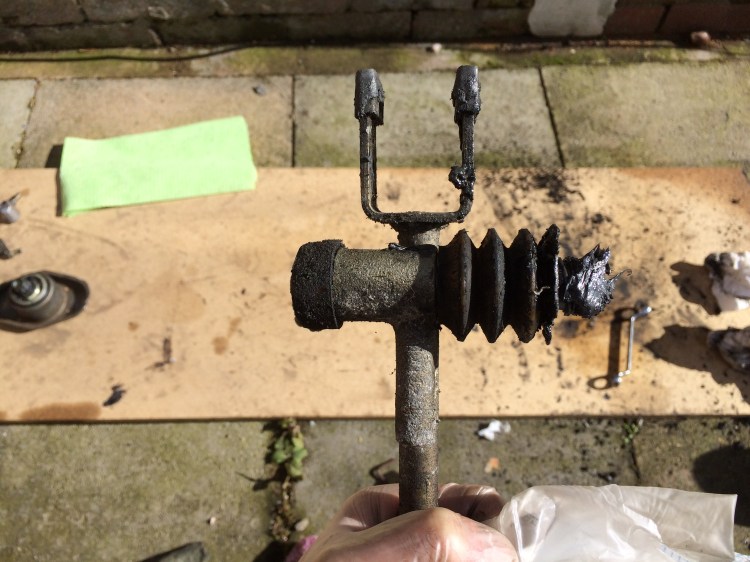
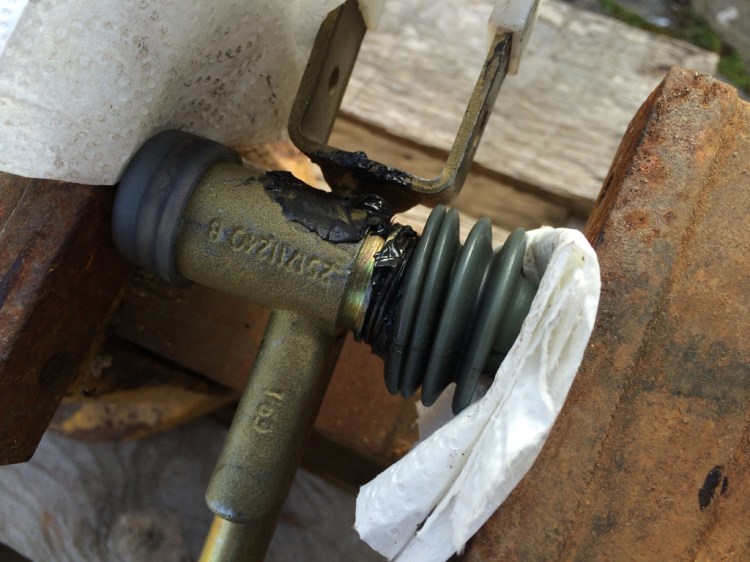
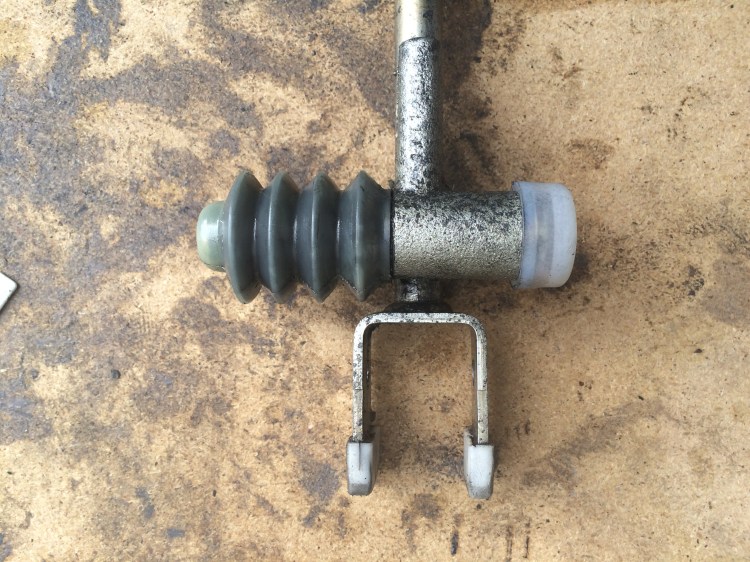
The bellows and end cap can be simply pulled off, you can then remove the clips holding the spring and rod in place. I did not push the rod completely out (if you do there is a ball bearing under pressure from another spring which will shoot out, be careful). By pushing the rod slightly out I could check on the band which act as a dampener for the ball bearing, it fell to pieces straight away so I replaced it with some o-rings.


Replacing the bellows is a PAIN! You need to fill it with grease and try to get the end over the lip which holds it in place. There are no tabs to pull on, there’s grease everywhere and you’re working against the pressure of the spring. It took me a good 45 minutes to get it on and i’m still not entirely sure how I did it.
If anyone has a method to get the bellows on easily, please share! I hope I never have to do it again…
Update (06/06/2016)
Doug Staplehurst suggested using a vice in the comments. I have since used this technique fit a new solid core gear lever with resounding success.
The plastic guides at the end of the forks are a little worn so are probably contributing to the play in gear selection. I’ve decided not to replace them just yet, when I do I can get them from Brickwerks.
Bent Gear Lever
A common reason for knuckles hitting dashboards is a bent gear lever. 25 years of jamming it into 1st/reverse can slowly, bit by bit, bend the long tube. The gear lever should be straight with one bend, then straight again.
I took a picture of the lever into Photoshop and overlaid how the lever should be. It’s quite apparent it’s bent:
I’ve not attempted to correct this for fear of snapping the hollow tube. I intend to add a lever extension so should help with the knuckle rash!
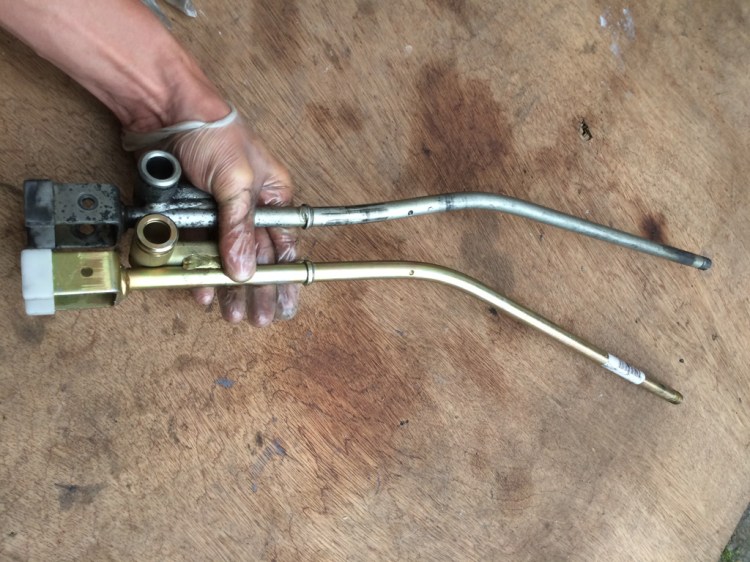
Update (06/09/2016)
I purchased a new gear lever from JustKampers which is solid core so should hopefully not bend over time. The picture below shows the comparison against the old lever:
The Refurbished Parts
Refitting
Putting everything back is a reverse of the removal instructions. The gear lever is inserted through the cab hole from the underside and reconnected to the linkage using the bushes and bolt from the Refurbishment Kit.
The assembly slides down the gear lever and bolted back into the cab floor. Align the marks you made on the floor plate when removing the old assembly to the four holes and secure the two bolts. The lever needs pulling up so the spring and locking collar can be fitted back in place (a second pair of hands helps here).


With the gear linkage box bolted back in place everything should be back as it was and gear changes should be much smoother.
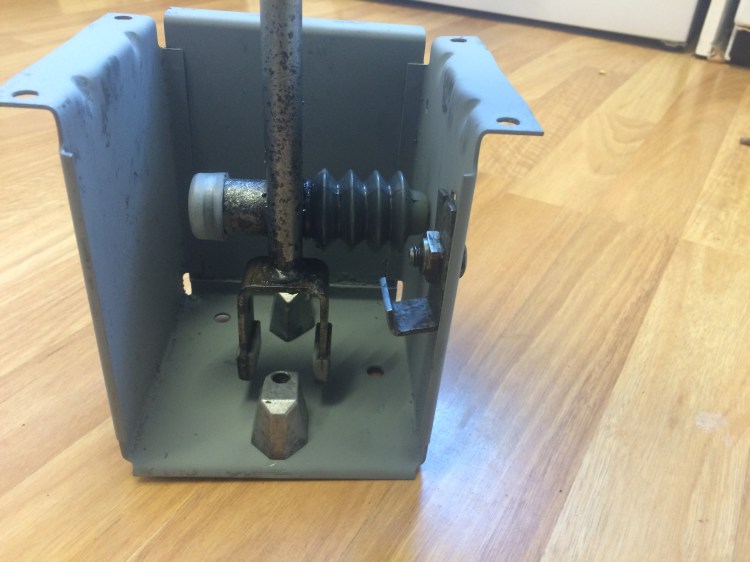
In the image above you will see the forks are slightly to the left when in neutral. They should sit directly over the aluminum guides for 2nd/3rd gears. I’ll be adjusting this next week so will do another post for that. (EDIT: New post here: Gear Linkage Refurbishment).
The images below show the position of the linkage for 1st and Reverse gears:


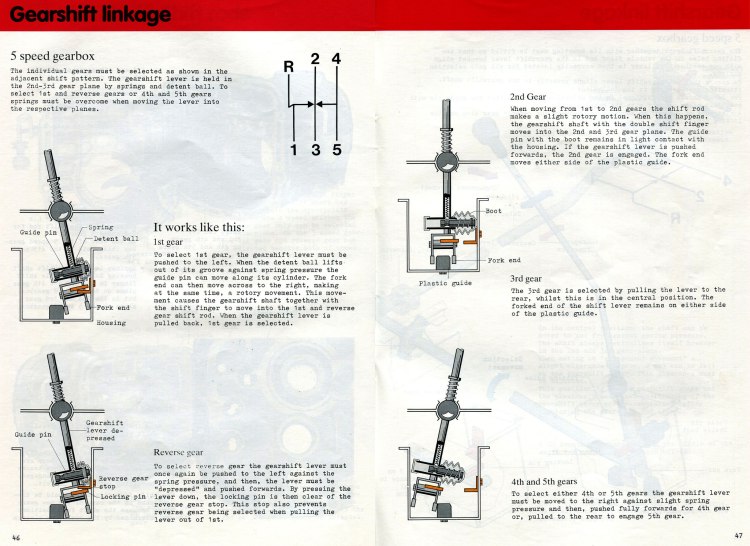
The diagram is from the Transporter with Water-cooled Boxer Engine Construction and Operation VAG Self Study Programme which also includes information on the 4 speed gearbox.
Part numbers in this post:
- Gear Stick Refurbishment Kit – 251798116A
- Bellows – 251711248A
- Clinch Bolt – 251711246A
- Securing Circlip – N0122831
- Damping Ring – 251711226
- Detent Spring – 251711244B
- Detent Ball Bearing – N0256663
- E-clip – N0124382
- Return Spring – 251711247A
- Cap – 251711242A
- Guides – 251711177
- RHD Gear Stick – 252711117C

That bellows on the bottom of the gear lever— I put it in a vice and compressed the Bellows and detent shaft so I had enough of the bellows to lip over the groove.
LikeLike
Thanks Doug, I’ll add it to the post. I recently fired a new solid shaft gear lever and used your technique, worked a charm!
LikeLike
Thanks Doug.very useful topic for me.
LikeLike
Hey,
great write up. any chance you have the diagram for the 4 speed box ?
the link is down…
LikeLike
Hi Itamar, i’ve update the link so it should now work. James.
LikeLike
thanks. great job
LikeLike