
With an impending MOT due in September it was time to address the rust issues in the van. The worst area was the offside sill behind the fridge and the only way to access this area is to remove all the interior units.
I followed JonathanR’s excellent thread on the Club 80-90 forum detailing how he removed the interior from his 1991 Autosleeper Trident.
Units were removed in the following order: seat box, rear wardrobe, fridge, propex, main unit.
Note: Before you start, unplug the earth on both batteries.

Seat Box
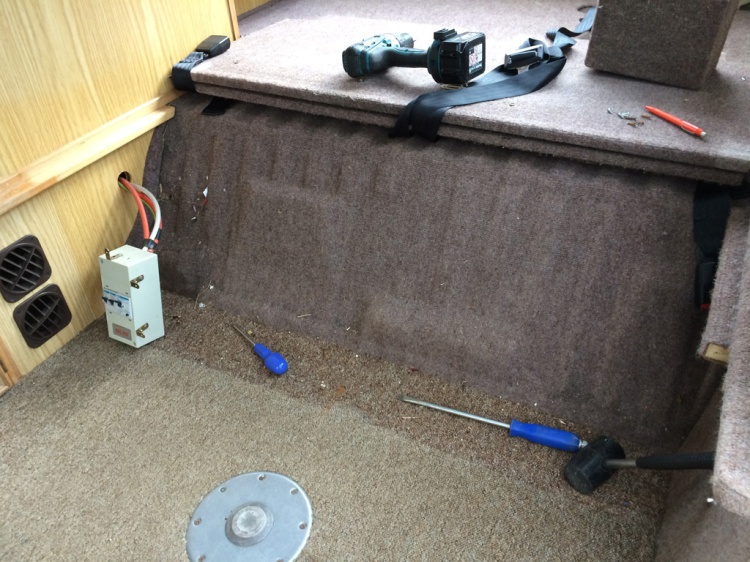
The seat box needs to be removed as it acts like a wedge between the main interior unit and nearside panel. First, remove the 240v fuse box cover by removing the three screws.


Once off you will then have access to all the screws which hold the seat panel in place. On the right side there are two hidden screws which go through the panel into a supporting brace.


With the panel removed you can take the cover off the 240v fuse box and unscrew the connections. This is necessary so the wiring can be fed through the hole in the main unit when it is removed.
Rear Wardrobe
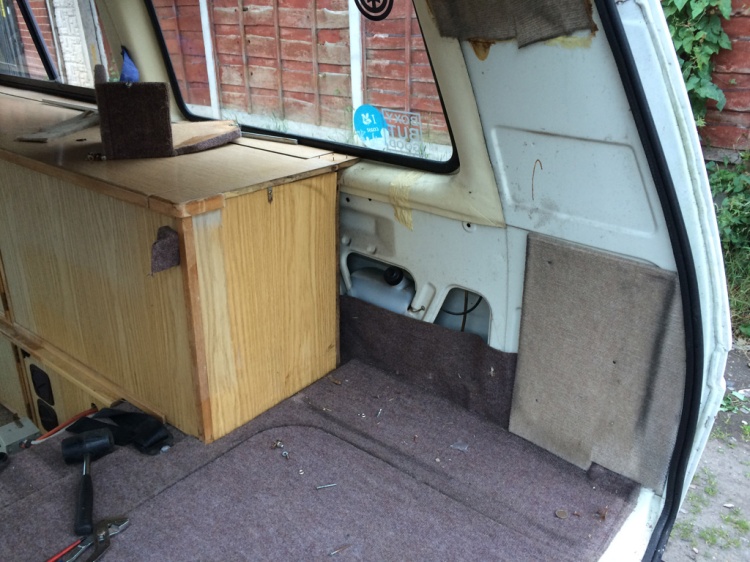
The large rear wardrobe is independent from the main interior unit. The first step is to prise off the small ledge between the cupboard and window.


Next, remove the rear silent gliss curtain rail as it gets in the way when the wardrobe is moved.
There are then two screws in the top section, five on the left (into the main unit) and two into the floor (on L shaped brackets). With all the screws out the wardrobe needs some serious jiggling to get out (it has been wedged in for 25 years). Push it towards the rear of the van with the tailgate open.


Once out you can enjoy how roomy your van now feels.
Fridge
Note: Before removing the fridge, unplug and remove the gas canisters in the lower left cupboard.
The fridge is secured by four capped screws in each of the adjacent cupboards. With the screws removed grab the fridge at the top and wiggle/pull it out about 15cms. This will give you access to the copper gas pipe connection.
Note: If you pull it out too far initially (like I did) it will kink the copper pipe and will need replacing.
Undo the copper connection. (You may smell gas at this point from what is left in the pipe. Nothing to worry about).
When you pull the fridge out further the flue into the vent will disconnect from the rear.


On the right hand side are the 240v and 12v connections. There is also a wire attached to the switch, this runs to the Zig unit, powering a LED indicator when the fridge is on 12v.

Undo the electrical connections and the fridge can be pulled completely out. Behind the fridge you will find lots of dust and most probably, rust.
In the below image you can just see the the flue in the top left and the copper gas pipe which I kinked.
On the floor are four screws which hold two wooden battens in place. The left side has a square of fireproof asbestos which sits under the gas flame.

Replacing the copper gas pipe
As I kinked the copper pipe by pulling the fridge out too far before disconnecting I replaced it by using a mini pipe cutter, compression coupler and a length of hand-bendable copper pipe.

Propex Unit
The Propex unit is behind a hidden wall in the bottom right cupboard. There are five screws which secure the side panel in place.
The Propex unit is held down with four screws, two each side. Additionally there is a copper gas pipe at the rear which needs disconnecting.
Lifting the Propex unit slightly reveals the floor air funnels, these are held in place with jubilee clips. I was unable to get access to the screw threads so cut through the funnels with the intention of replacing later. (I’m sending the unit to Propex to be refurbished).


On the floor behind the brown blower holes is one screw which needs removing.
Main Unit
With everything else removed the main unit is nearly ready to come out. There are several screws holding it in place.
Firstly, in the gas cupboard there is one screw attached to the vertical pillar and one secured to the floor.
Next, in the pantry is a long wooden strip. Remove this and you will be able to access the two long screws which go into the side panel.


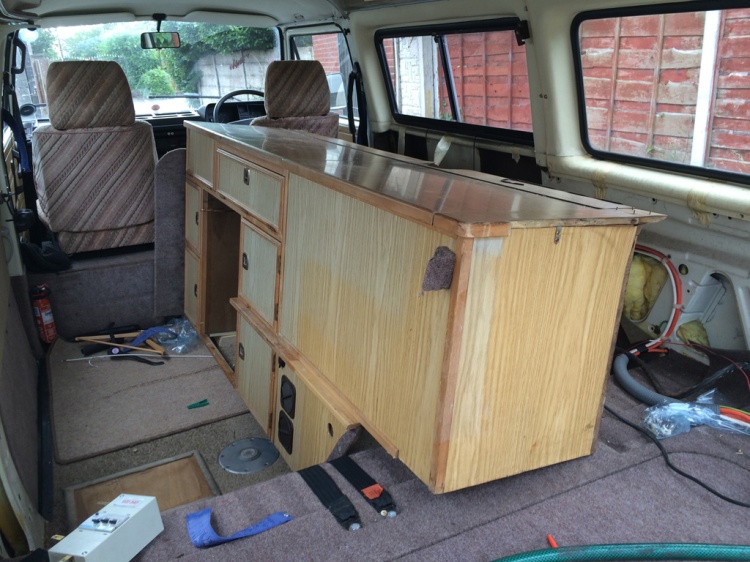
With all the screws out the unit can now be moved out. The only thing preventing it moving is the vent in the gas canister cupboard as it goes down into a slot in the floor.
I pulled on the front corner (picture below) and tilted the unit towards me. I was then able to slide a block of wood from the fridge cavity next to the gas canister vent, lifting the unit off the ground.

With the unit moved forward I could access the fresh and waste water pipes. Both are connected with Jubilee clips, the freshwater pipe connects to the water pump and the waste pipe connects under the sink.


Pictures of the back of the unit for reference:


With the unit removed I had full access to the offside sill and wheel arch.

Nearside Wheel Arch
As I am addressing all the major rust areas I also needed to access the nearside wheel arch. With the seat box removed it’s a simple case of removing all the screws holding the panel in place.


In the pictures you can see the rockwool insulation used by Autosleeper, the issue with this type of insulation is it holds moisture. You will see the effect this has had on the bodywork in my next post, Rust!

I am about to do exactly this, probably starting tomorrow. Thank you for your post! That will save me lots of time. I have a T25 Trident from 87.
LikeLike
Just finished refitting all the units in my 1990 Autosleeper which required welding under the fridge and front wheel arches. I fitted a new plywood floor and a complete set of carpets. I also recovered all the units with the same pattern Fablon which is still available from Homebase. Now looking a very smart campervan. Your post was invaluable and saved me lots of time which was very much appreciated.
Last year we(myself, wife and border terrier) had an excellent trip to Slovenia and we are now planning new adventures.
LikeLike
Hi Les. That’s great to hear!
Which Fablon did you buy? Was it the Oak Rustic?
I’ve been trying to find a match for ages.
LikeLike
Hi James. Rustic Oak is a perfect match. It’s a fiddly job, the old Fablon will pull off but if there are no wrinkles you can apply it over the old.
Good luck.
LikeLike
Thanks Les, that’s great. How many rolls are needed to do all the units?
LikeLike
Hi James, one roll will just about do it at £12-95. I only covered areas that were visible. Also where it was difficult to pull off the old Fablon a hot air gun helped to soften the adhesive.
LikeLike